Customize profiles
The Profile Editor page allows you to select the Profile Type, Grouping Type, Filters, and other parameters for a particular profile.
NOTE: To help you get started, download the Profiles FAQs sheet.
The profile editor screen in Scorecards looks similar the following display; PPE Reporting and Facility Reporting Profile Editors look and function similarly, but have only the Profile Information and Filters sections.
After you are in the Profile manager, you can access the Profile Editor by:
- Editing an existing profile
- Click the pencil icon in the right column of your profile of interest

- Creating a new profile
- Click +Add Profile in the upper right corner of the Profile Manger page.

Customization: Internal profiles
The following steps outline the setting options you have for internal profiles; several of the steps are hyperlinked to additional pages with more information.
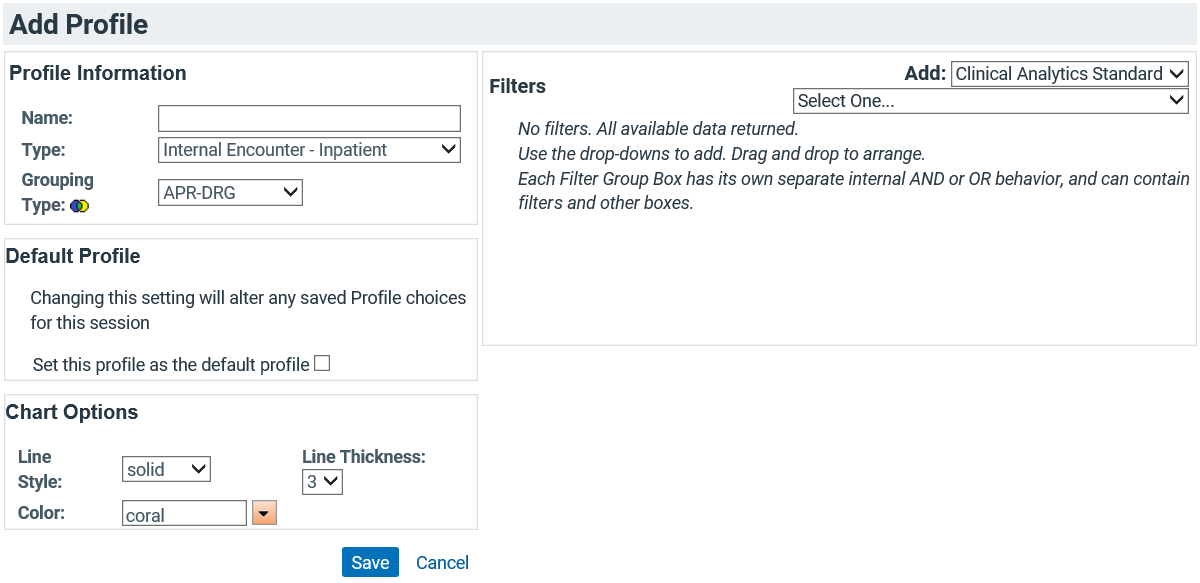
- Profile information:
- Name your profile something short and simple, but with enough detail to know the differences between your profiles as you are using them for your analyses.
- Select your Profile types.
- Select your Grouping type; these options may change depending on your Profile Type selection.
- Default Profile: To designate this profile as the default profile in your scorecard, check this box.
- Chart Options: Select the color, line style, and line thickness for this profile's appearance on line charts. To provide contrast for profiles on the same line chart, use varying colors and a thickness of at least 3.
-
Filters: Click the Add dropdown menu to select the type of filter to add, then select the parameters of the filter. See Profile filters for more details.
NOTE: Filters are not available for the All Encounter Types profile type.
- When you have finished applying filters and defining your other profile options, click Save in the lower left to return to the Profile Manager page. To exit without saving changes, click Cancel.

Customization: Peer group profiles
When you select Peer group as your Profile type, the settings in the Profile editor change.

- Because the benchmark values are matched to the grouping type of the internal profile, you cannot select a grouping type for your peer group profile.
- You still have the Chart Options settings for Peer Group profiles.
- The Filters section of the Peer Group profile is unique from the other profile types.
Peer group profile filter settings
- Indicate whether the benchmark data source (Payer) is All Payer or Medicare.
- Click the dropdown to select from the benchmark data loaded onto your server.
- If the peer group you would like is grayed out, the benchmarks for the peer group are available on your server, but for the other payer. Switch the radio button payer selector, then select your peer group from the dropdown menu.
- Benchmark data must be loaded onto your server before it is available to be used in a Peer Group Profile. If you do not see your Peer Group of interest in the dropdown list, contact your Facility Administrator or see Benchmarks for more information about loading additional benchmark data onto your server.
- Select the Percentile for your Peer Group benchmark values. This still references the median value for each measure for each facility, but the displayed benchmark value is the median value from the facility in the chosen percentile of the peer group. See Benchmark calculations for more information.
- Projecting Benchmarks estimates a benchmark in the case of missing benchmark values; if these values are not projected, there may be no benchmark value for some encounters for some measures.
- When you have finished applying filters and defining your other profile options, click Save in the lower left to return to the Profile manager page. Clicking Cancel exits the editor without saving changes.
